


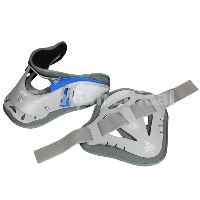
Ortel C4 Vario
Rigid cervical collar
Features & benefits
The C4 Vario alleviates pain and contraction by immobilising the cervical spine, which restricts the movements responsible for inflammatory phenomena.
The C4 Vario helps with the static support of the head, reducing mechanical forces by compressing the cervical spine by means of an anterior lateral shell(with chin and sternal support) and a posterior shell (with occipital and upper dorsal support).
The increase in local heat, generated by wearing the C4 Vario, completes this analgesic role by affording improved muscle relaxation
- One size fits all (Neck sizes 31-48 cm)
- Breathable padding
- Swivel chin support
- 6 Adjustable height settings (9-16cm)
- X-Ray Transparent
- Tracheal space
Indications
- Post Operative immobilization
- Immobilization after Serious neck injury Severe Spondylarthritis
- Severe Cervical Syndrome
- Slipped Cervical Discs
- Stable Cervical Fractures
- Physical Wear and Tear
Sizing guide

Fitting & user guide
The Ortel C4 Vario must be fitted individually to each patient by qualified experts. At least two people are needed for the first fitting: One to hold the head and neck of the patient in the correct position while the other fits the orthosis.
- Place the patient in a neutral position with the head aligned to the centre.
- Place the neck part of the orthosis at the centre back of the throat.
- Then place the front of the Ortel C4 Vario at the centre of the back part.
- Hold the front of the orthosis firmly and place the ends tightly around the patient‘s neck. Fasten the orthosis by alternately tightening the rip tape bands, making sure they are the same length on both sides. If necessary, the surplus at the ends can be cut off with scissors. If the orthosis has been fitted correctly, it should no longer be possible for the chin to slip.
- The option of adjusting the angle of the chin ensures optimal pressure distribution and an improved fit to the anatomical conditions. Pull out the buttons for angle adjustment to fine tune the correct chin position. Adjust the chin position and fasten in place by pushing the buttons back in. Please ensure that the same height adjustment is performed on both sides.
CARE INSTRUCTIONS
• Before washing, take the pads out of the orthosis.
• Soak the pads in lukewarm soapy water.
• Squeeze the water out of the pads and dry away from any heat sources.
• All plastic parts can be cleaned with a damp cloth